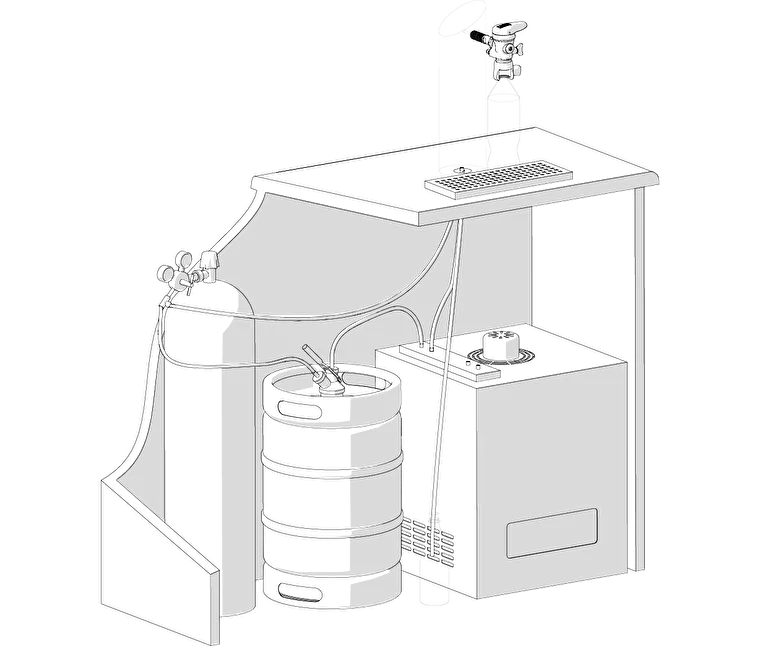
Learn about connecting Pegas Foam-free Tap for foam-free filling of plastic bottles with beer. Our guide provides easy-to-follow steps to ensure a smooth and efficient setup, helping you achieve perfect, foam-free beer pours every time.
Congratulations on choosing the Pegas Foam-Free tap. You have probably assembled and installed your foam-free tap. If not, you can find more information on how to do it in our previous posts.
Quick Reminder
Find more information on how to assemble and install the tap in our previous posts.
HOW TO ASSEMBLE EVOLUTION TAP + HOW TO INSTALL PEGAS EVOLUTION INTO BEER TOWER
WHAT DO YOU NEED FOR CONNECTING THE TAP?
- beer keg with a coupler
- CO2 cylinder with a pressure regulator (adjustable to 0.15 – 0.25 MPa
- food-grade LDPE hoses with 9.5 mm (3/8″) outside diameter or food-grade PVC hoses with 7 mm (1/4″) inner diameter
- hose clamps to fix flexible PVC hoses on nipples (if needed)
- T-fitting (if needed)
NB! It can be difficult to fit hard MDP hose onto Pegas tap’s nipple. as a compromise between flexibility and hardness, the manufacturer advises using Rehau 3/8” hose. Contact us to find out more
NB! If you would like to work with hard MDP hoses, it is possible to use speedfit G5/8” instead of the beverage supply nipple that comes with the tap. Screw the speedfit hose adapter into the tap’s shank and attach to the hose.
Connecting Pegas Foam-Free Tap Order:
- Connect the beverage hose to the keg coupler, to the cooler and then to the beverage nipple.
- Connect CO2 from the gas cylinder to the keg coupler and gas nipple with tees and hoses.
- Tighten the clamps.
- Put the drain hose onto the drainage nipple, put the opposite hose end into the drainage tank.


Recent Comments