Learn how to install Pegas Drive into your beer tower with our step-by-step guide. This post provides clear instructions and essential tips to ensure a smooth and efficient Pegas Drive installation for your draft beer system.
Pegas Drive represents the latest innovation in foam-free beer dispensing technology, offering a cutting-edge solution for your beverage needs. This advanced device is crafted from high-quality, durable plastic, ensuring a long lifespan while keeping costs remarkably low. What sets the Pegas Drive apart from older tap models is its sleek and modern design, combined with an incredibly user-friendly operation. One of the standout features of this tap is its tool-free maintenance—no special equipment is required, allowing you to assemble the tap and prepare it for use in just a few seconds.
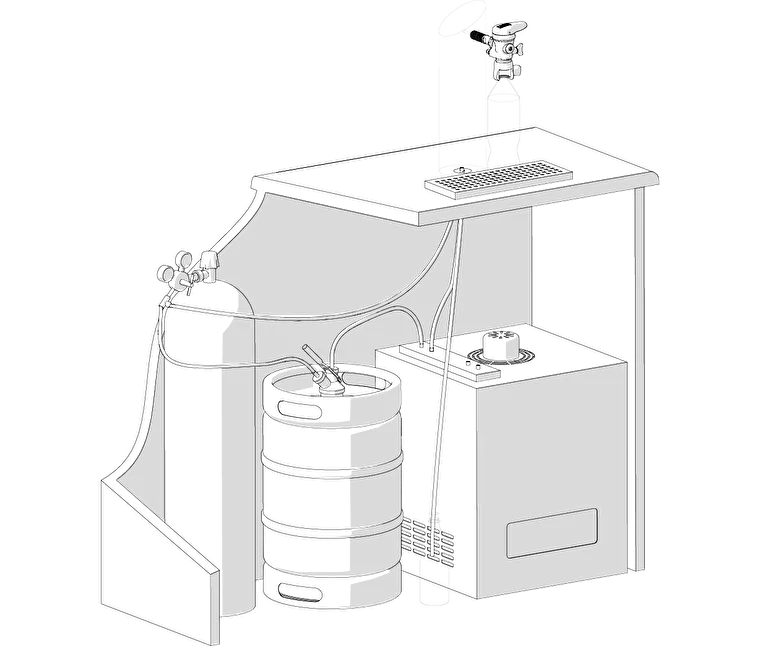
Pegas Drive installation is simple and requires just 5-10 minutes of your time. The tap can be installed into the beer tower or through a hole in the wall.
Manual
Steps
You will need the following instruments for Pegas Drive Installation: Wrench – S19, S24, S27, Hex Wrench S10.
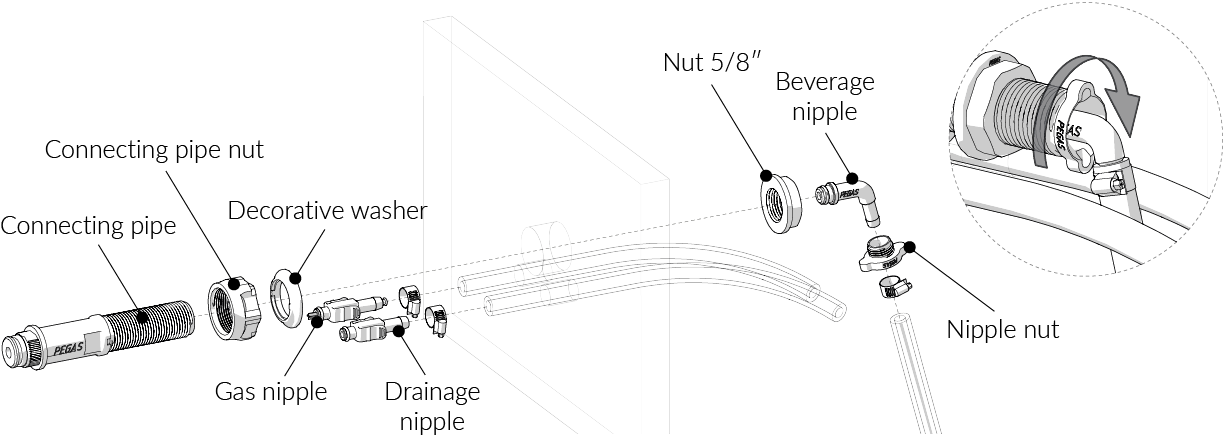
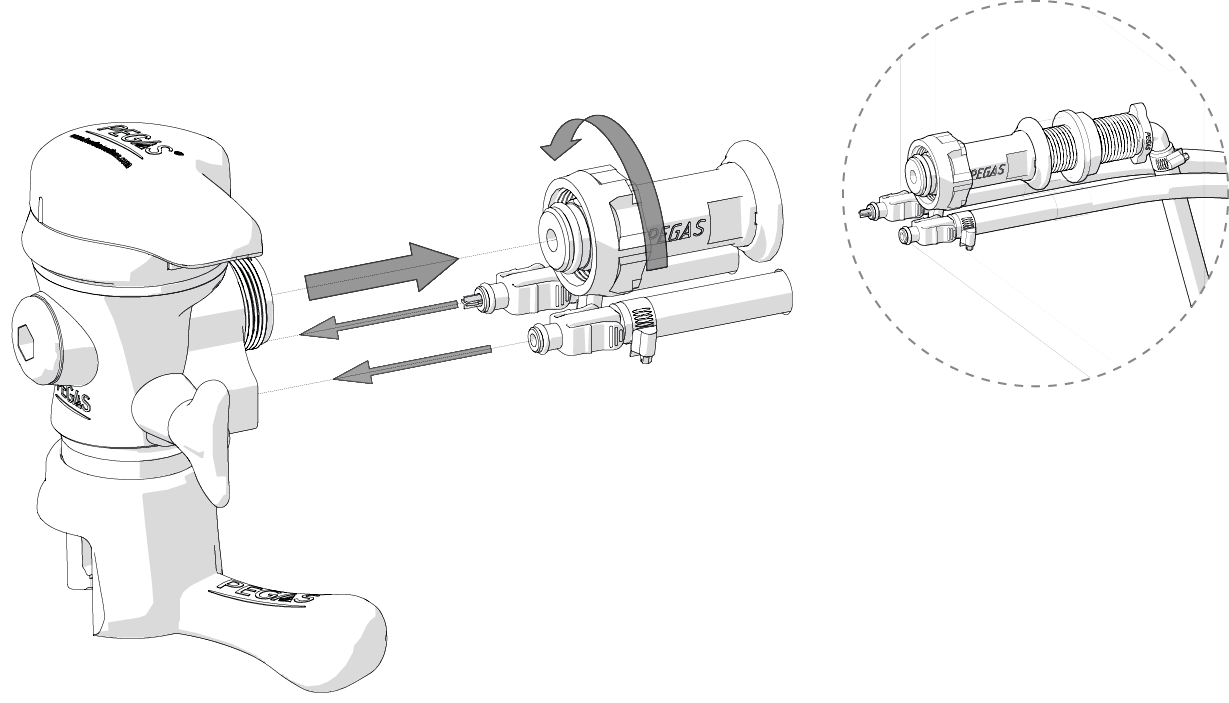
- Using an S19 Wrench screw the shank (connecting pipe) into the 5/8” threaded hole in body of the device. Secure it with the shank (connecting pipe) nut.
- Connect the beer hose with the beverage nipple; secure it with the nipple nut.
- Place a decorative flat washer onto the shank (connecting pipe).
- Connect the beverage nipple with the shank (connecting pipe) put through the whole in the wall or beer tower.
- Secure the shank (connecting pipe) with a 5/8” nut, tighten it using a wrench.
- Connect a CO2 hose and a drainage hose to the CO2 nipple and drainage nipple accordingly.
- Insert the CO2 supply nipple and the drainage nipple into the matching holes on the device; place the nuts onto the nipples and tighten them up.
- Optional: Using a Hex Wrench S10 unscrew the front plug and screw a dispensing tap for pouring into the pints.

Recent Comments